Dustin Kirkland
on 14 April 2016
As announced last week, Microsoft and Canonical have worked together to bring Ubuntu’s userspace natively into Windows 10.
As of today, Windows 10 Insiders can now take Ubuntu on Windows for a test drive! Here’s how…
1) You need to have a system running today’s 64-bit build of Windows 10 (Build 14316).

2) To do so, you may need to enroll into the Windows Insider program here, insider.windows.com.

3) You need to notify your Windows desktop that you’re a Windows Insider, under “System Settings –> Advanced Windows Update options”
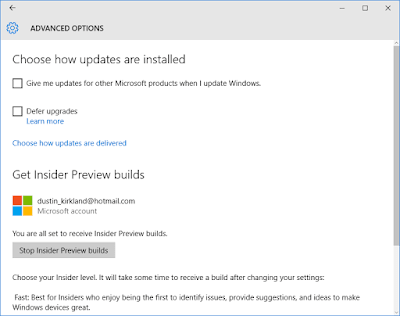
4) You need to set your update ambition to the far right, also known as “the fast ring”.

5) You need to enable “developer mode”, as this new feature is very pointedly directed specifically at developers.

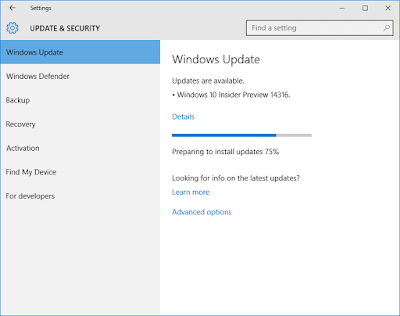
6) You need to check for updates, apply all updates, and restart.
7) You need to turn on the new Windows feature, “Windows Subsystem for Linux (Beta)”. Note (again) that you need a 64-bit version of Windows! Without that, you won’t see the new option.

8) You need to reboot again. (Windows sure has a fetish for rebooting!)
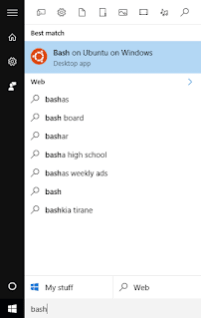
9) You press the start button and type “bash”.

10) The first time you run “bash.exe”, you’ll accept the terms of service, download Ubuntu, and then you’re off and running!

If you screw something up, and you want to start over, simply open a Windows command shell, and run: lxrun /uninstall /full and then just run bash again.
For bonus points, you might also like to enable the Ubuntu monospace font in your console. Here’s how!
a) Download the Ubuntu monospace font, from font.ubuntu.com.

b) Install the Ubuntu monospace font, by opening the zip file you downloaded, finding UbuntuMono-R.ttf, double clicking on it, and then clicking Install.

c) Enable the Ubuntu monospace font for the command console in the Windows registry. Open regedit and find this key: HKEY_LOCAL_MACHINE\SOFTWARE\Microsoft\Windows NT\CurrentVersion\Console\TrueTypeFont and add a new string value name “000” with value data “Ubuntu Mono”

d) Edit your command console preferences to enable the Ubuntu monospace font.